

Before Start Date
Step 1
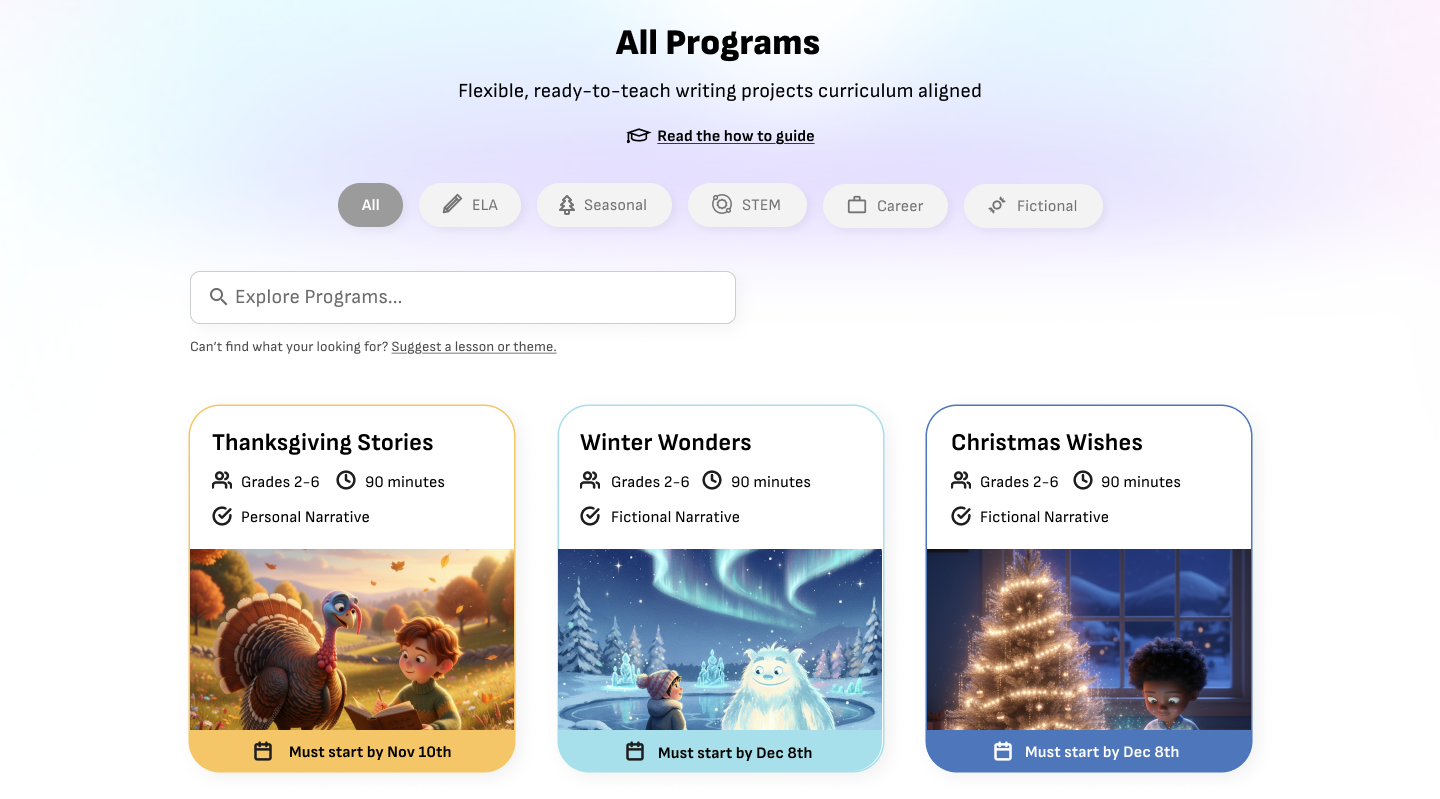
Pick a Classroom Program
Step 2
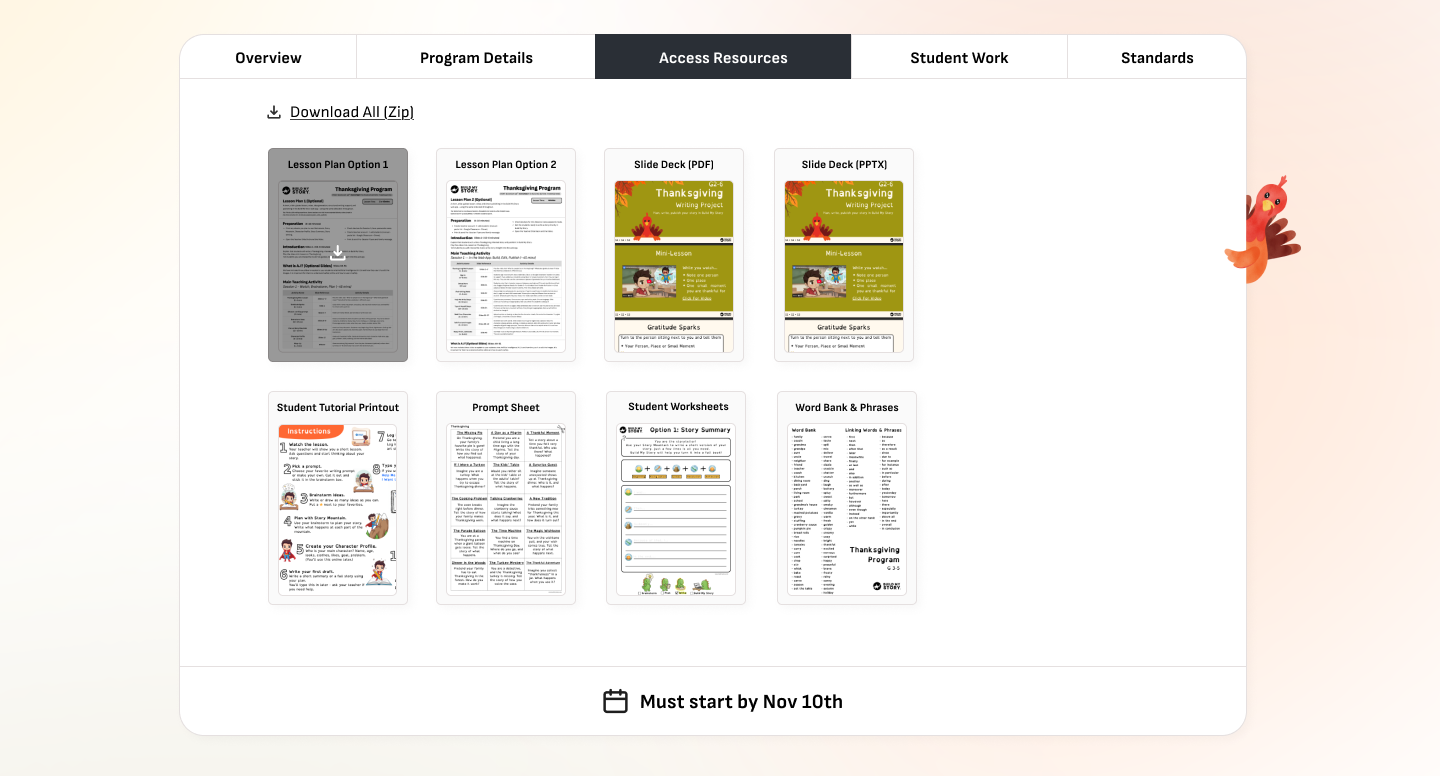
Open Your Resources
Step 3
Register Your Class
Step 4
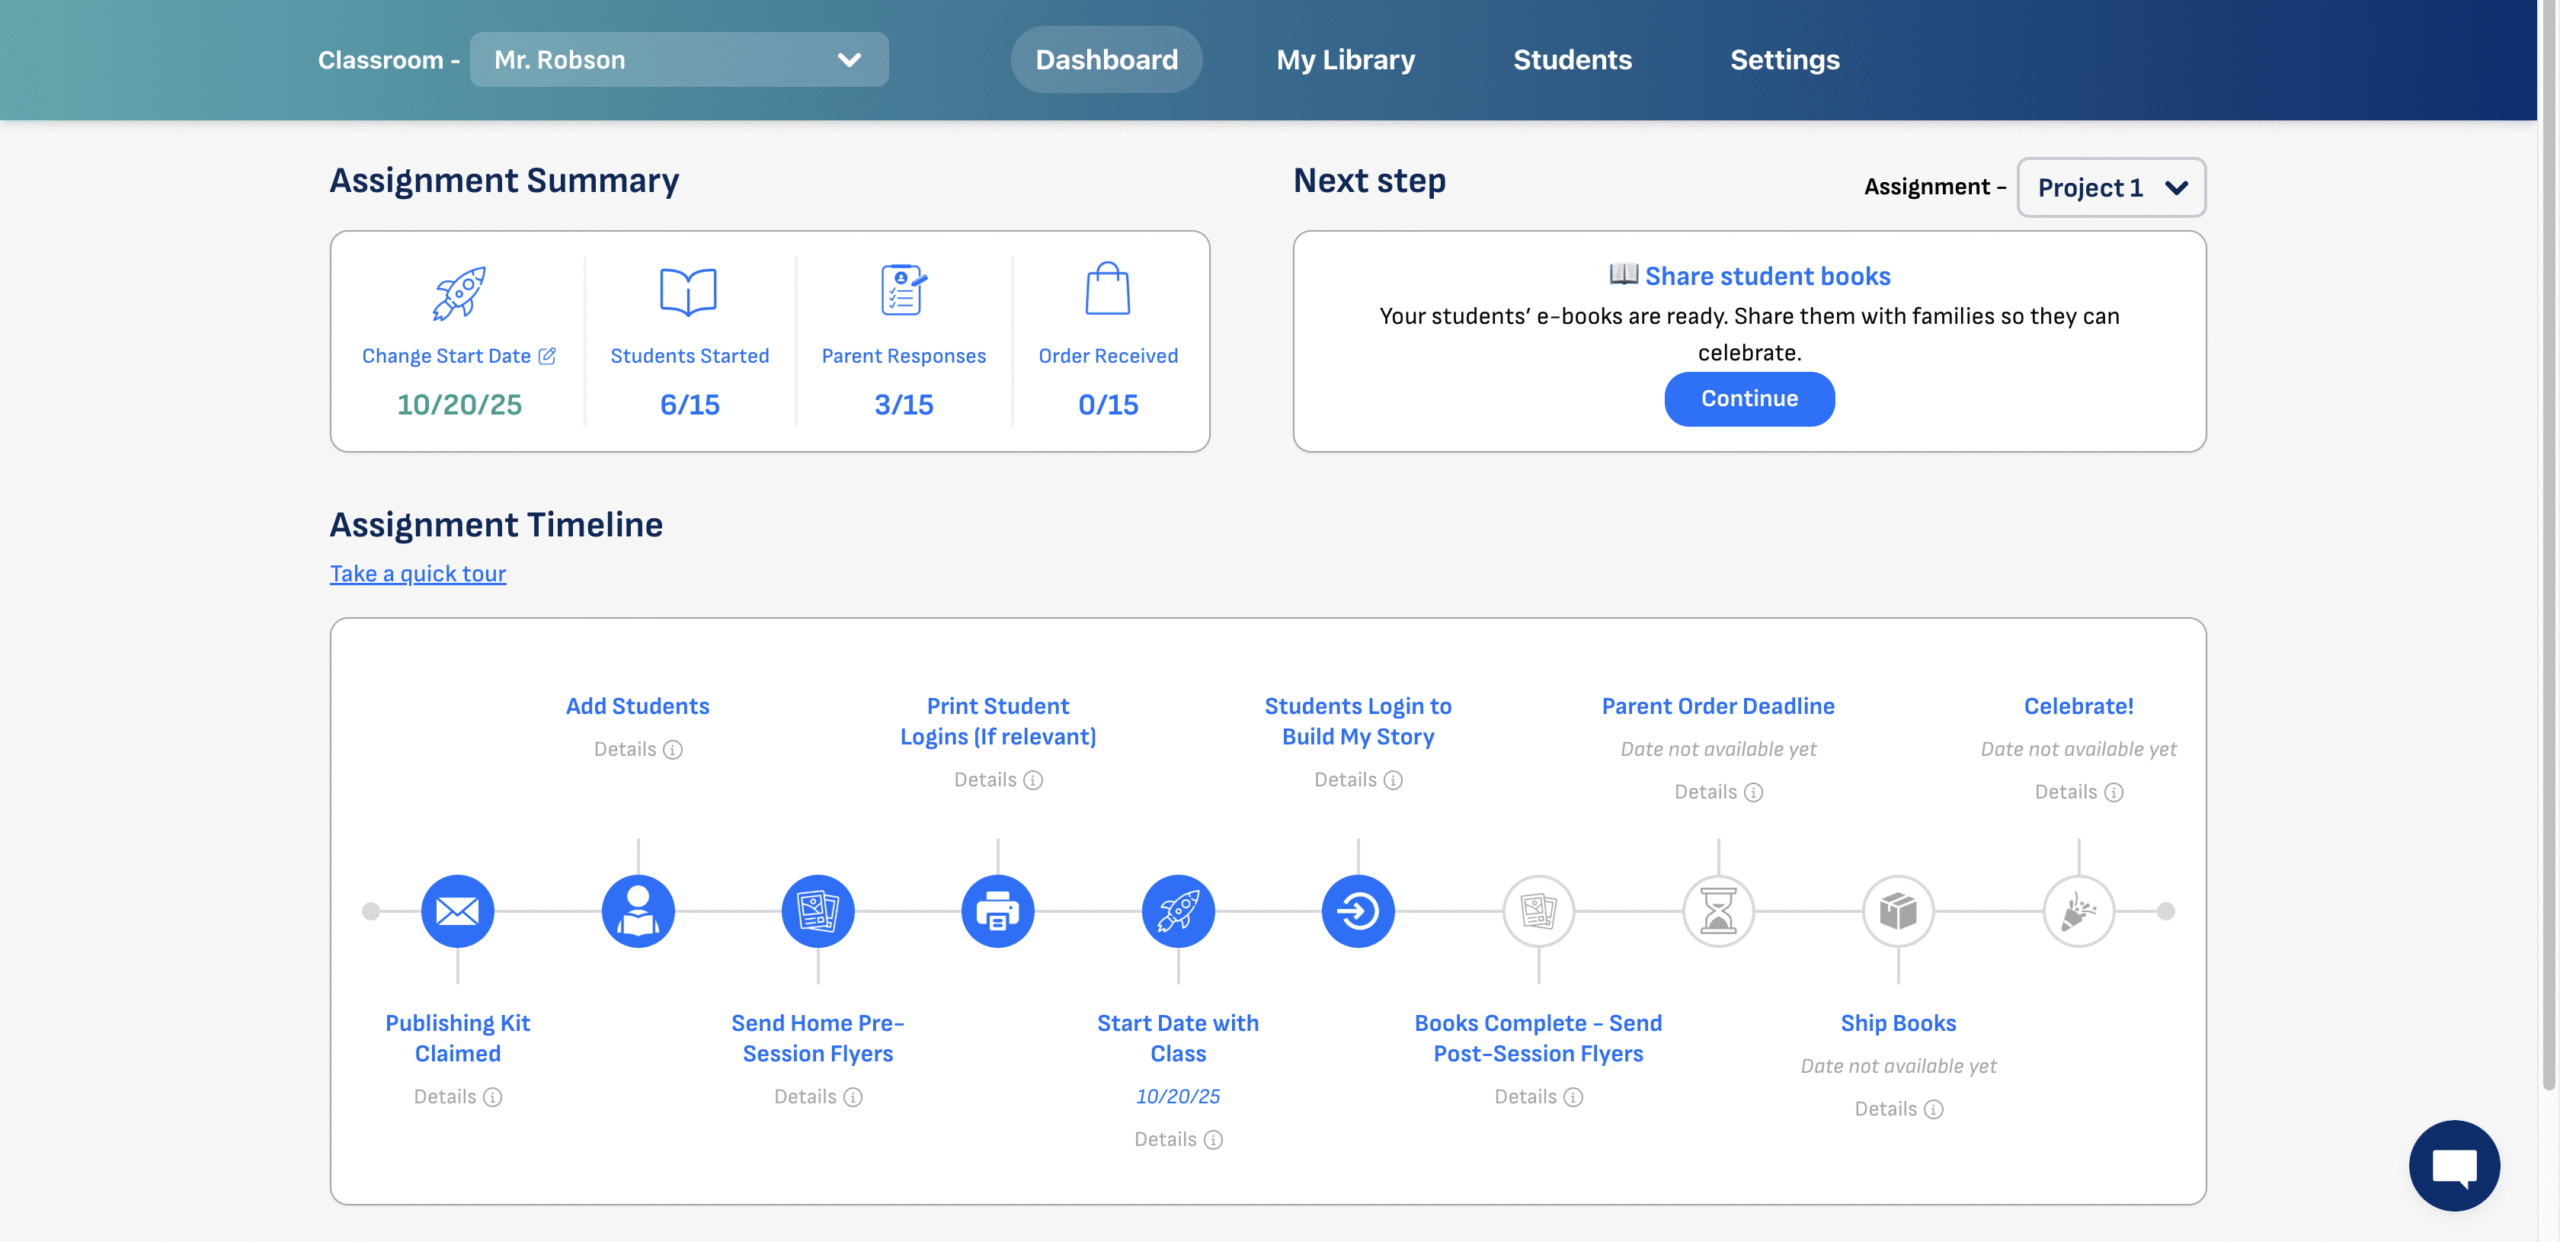
Follow Steps on Your Dashboard
During Program
Step 5
Guide the Writing Experience
Step 6
Students Build in the Web App
Step 7
Track Progress and Share Books
Step 8
Celebrate Your Writers!
Pick a Classroom Program
Choose a themed project for a seasonal event or a program based on a classroom topic. Each program page shows timing, sample student books, and included resources. Every student will receive a Free e-book, and families can order printed copies for your celebration. No child misses out because every student finishes with their own book to share and keep.
Open Your Resources
Access lesson plans, video, slides, worksheets, prompts, and word banks under ‘Access Resources’. Download what you need, then choose the experience that fits your schedule.
- Lesson Plan Option 1 (2–3 sessions) provides a full, standards-aligned writing experience.
- Lesson Plan Option 2 (1 quick session) is for classes that already have stories written and simply want to publish.
You can revisit the page anytime and share the program with another teacher.
Register Your Class
Complete the registration form, then create your educator account to secure your spot. Add students manually or through Clever or Google Classroom, set your start date, and follow the guided steps on your dashboard.
Start dates are important. Printed books take about 10 days to arrive and ship directly to your school, so plan celebrations at least two weeks after the final session.
Follow Steps on Your Dashboard
Your dashboard guides you through all preparation before students begin. Tasks appear in order and check off automatically as you finish them. Start by sending Pre-Session Flyers to families which has details about the free e-book and printed copies. This short prep stage ensures your class is ready to log in and start together.
Guide the Writing Experience
Use the slide deck and short video lesson to lead students through planning and writing. They start on paper with worksheets, then move online to bring their stories to life. The slides support each stage so your class moves smoothly from ideas to final text.
Students Build in the Web App
Students type their story, design their main character, and then watch their book come to life with AI illustrations. They can edit the story and images whenever they want. It’s a simple, safe introduction to using AI creatively in class, and the whole process takes just one class period.
Teacher Tip: Click Create a Book in your dashboard to try the process yourself. It’s the same view your students use and takes just a few minutes.
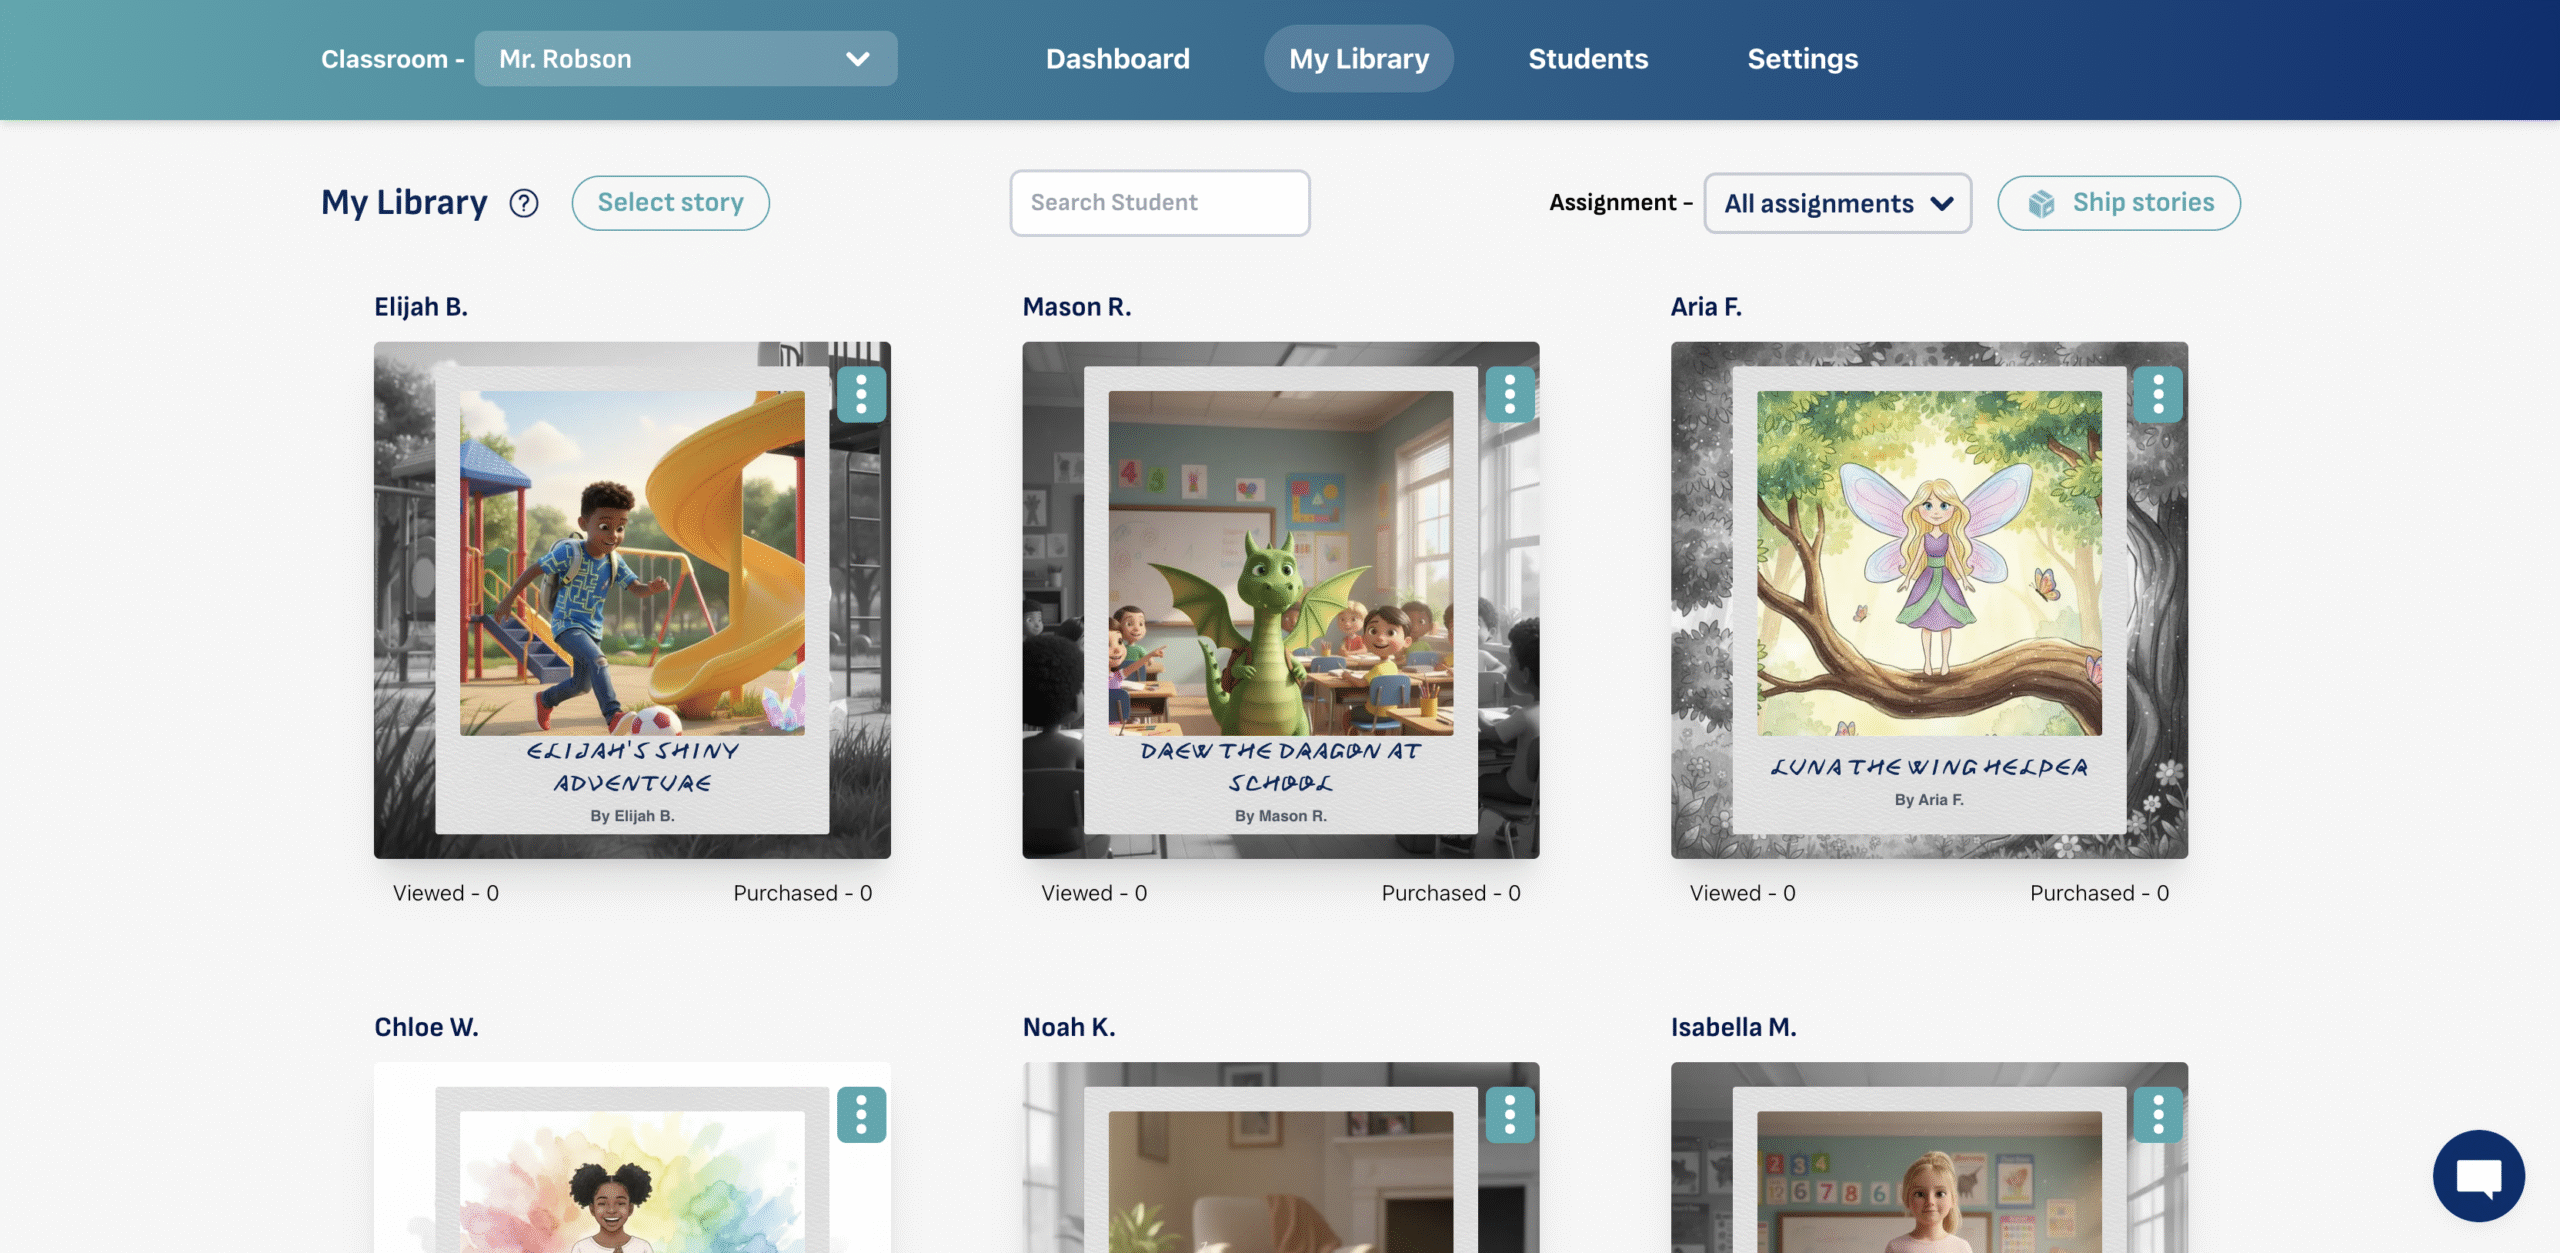
Track Progress and Share Books
Your dashboard continues to guide you as students finish. Open your Class Library to view or edit each book and see who has completed their story. Send flyers so families can read the free e-book, download a PDF, or purchase printed copies. Books ship to your school for easy classroom handout.
Celebrate Your Writers!
Make publishing day fun and memorable. Host a short read-aloud showcase or a “book-signing” circle where students swap and sign each other’s books. Every child leaves as a published author, and your educator account stays active for the next program.
Ready to start your class?
Choose a program and help your students become published authors of their own personalized storybooks!
Note: Some of our popular seasonal programs have limited windows to run, so check the start deadline to make sure you start on time.